Easy Gluten-Free Sourdough Bread For Beginners
This post may contain affiliate links. Please read our disclosure policy.
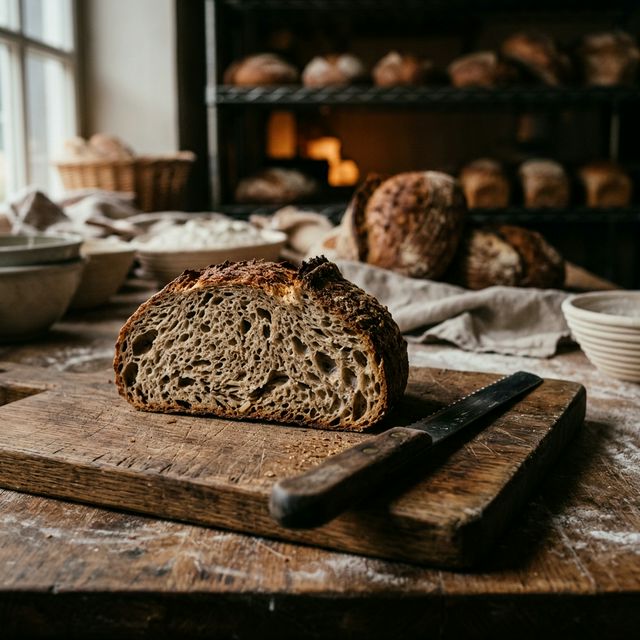
Missing real, crusty, tangy sourdough bread? This step-by-step guide walks you through making a gluten-free sourdough starter and baking your first perfect loaf.
Want to save this recipe?
Enter your email and we'll send it to you! Plus, get new recipes every week.
The Missing Loaf
If there's one thing celiacs mourn more than anything else, it's a crusty, tangy, artisan slice of sourdough bread. The kind that shatters when you bite into it but remains soft and airy inside.
Store-bought GF bread is usually tiny, dense, and requires toasting just to be edible. But making your own GF sourdough? It changes everything.
Why This Recipe Works
The Ingredients (And Why Each One Matters)
🔍 Still reading labels the hard way?
Check Gluten scans any food label in 3 seconds and tells you exactly what's safe. Trusted by celiacs worldwide.
Step-by-Step Instructions
Expert Tips for Perfect Results
Easy Ingredient Swaps
If you don't have the patience for sourdough, try our Soft & Sliceable GF Bread which uses standard yeast!
📩 Want more tips like this?
Join celiacs getting weekly gluten-free tips, recipes, and hidden gluten alerts.
No spam. Unsubscribe anytime.
Storage & Reheating
Store wrapped in a cotton towel at room temperature for up to 2 days. For longer storage, slice the entire loaf and freeze it. You can toast slices directly from frozen!
Get the Ultimate Celiac Bundle — 500+ recipes, restaurant dining guide, and label reading cheat sheets for just $12.
FAQs
Can I use a 1-to-1 flour blend for sourdough?
Generally, no. Most 1-to-1 blends contain xanthan gum, which can make a slow-fermented sourdough turn into a gummy mess. You need individual flours for artisan bread.
Why didn't my bread rise?
Either your starter wasn't active enough (it needs to be bubbly and doubled in size before using) or your kitchen was too cold during the bulk rise.
Why is the inside gummy?
Two possible reasons: you sliced it while it was still hot, or your oven temperature dropped and it didn't bake long enough to dry out the center.
🔍 Not sure about a product?
Check any food label instantly with our free AI gluten scanner — detects 500+ hidden gluten sources in 3 seconds.
Easy Gluten-Free Sourdough Bread For Beginners
Missing real, crusty, tangy sourdough bread? This step-by-step guide walks you through making a gluten-free sourdough starter and baking your first perfect loaf.


Ingredients
- 1 cup Active Gluten-Free Sourdough Starter
- 2 cups Brown Rice Flour
- 1 cup Tapioca Starch
- 1/2 cup Sorghum Flour
- 2 tbsp Psyllium Husk Powder
- 1 1/2 tsp Salt
- 1 tbsp Honey or Maple Syrup
- 1 3/4 cups Warm Water
Instructions
Prepare the psyllium gel: Whisk the psyllium husk powder into the warm water and let sit for 10 minutes until it forms a thick gel.
In a large bowl, whisk together the brown rice flour, tapioca starch, sorghum flour, and salt.
Add the active starter, honey, and the psyllium gel to the dry ingredients.
Mix thoroughly using a stand mixer or wooden spoon until a sticky dough forms. Knead for 5 minutes.
Shape the dough with wet hands into a round boule and place it in a heavily floured banneton basket.
Cover and let rise in a warm spot for 4-6 hours, or until visibly puffed (it will not double in size like wheat bread).
Preheat your oven to 450°F (230°C) with a Dutch oven inside.
Score the top of the bread and carefully transfer to the hot Dutch oven.
Bake covered for 40 minutes, then uncover and bake for 30 more minutes until deeply browned.
Crucial step: Let the bread cool completely on a wire rack for at least 4 hours before slicing. Cutting it hot will make it gummy!
Find Gluten-Free Recipes on Amazon
Shop certified gluten-free options
Top Gluten-Free Picks
📢 Found this helpful? Share it!
Stop Guessing. Start Scanning.
Every ingredient label has hidden gluten risks. Check Gluten's AI catches them all — in 3 seconds flat.
Camera + text input
Priority support
No credit card required • Cancel anytime
The Ultimate Celiac Survival Bundle
Stop stressing over cross-contamination and what to make for dinner. Get our complete 500+ recipe cookbook, dining out guide, and label reading cheat sheets.
200+ GF Baking Recipes
& Fast Food Protocols
Instant PDF Download • 60-Day Money Back Guarantee
About the Author
Rachel Lopez
Recipe Developer & Certified Pastry Chef
Rachel is a classically trained pastry chef who transitioned to gluten-free baking after her daughter was diagnosed with celiac disease. She develops and tests every recipe on Check Gluten, ensuring they work perfectly with GF ingredients.
Meet our full team →Medical Disclaimer: This article is for informational purposes only and is not a substitute for professional medical advice. Always consult your physician or a registered dietitian before making dietary changes related to celiac disease or gluten sensitivity. Read full disclaimer.
Related Articles
Easy Gluten-Free Meatballs (Better Than Store-Bought)
Tender, juicy, authentic Italian meatballs made entirely gluten-free. No special GF breadcrumbs required—we use a secret pantry ingredient to keep them perfectly soft!
Ooey Gooey Gluten-Free Cinnamon Rolls
You CAN have pillowy, melt-in-your-mouth cinnamon rolls on a gluten-free diet. This yeast-based recipe creates the magnificent, gooey breakfast treat of your dreams.
Fluffy & Buttery Gluten-Free Biscuits
Mile-high, flaky, buttery gluten-free biscuits that don't crumble when you butter them. Only 6 ingredients and ready in 30 minutes!
Store-Bought vs Homemade GF: The Real Cost Comparison That Will Change How You Eat
We priced out 10 common gluten-free products: store-bought vs homemade. The results will make you never buy $8 GF bread again.